
Your first attachment
Updated November 9, 2026
This sends a welcome packet with every registration, then adds a second file that only some entries get.
Attach a file to every email
- Upload your file to the Media Library (Media → Add New Media File), or upload it in step 4.
- Go to Forms, hover over your form and click Settings → Notifications.
- Click the notification to edit it, for example Admin Notification or your confirmation email, and scroll to Attachments (KodaClip) at the bottom.
- Click Add files, select one or more files in the Media Library and click Attach selected files.
- Click Update Notification.
Every email this notification sends now carries the file.
Attach a file only to some entries
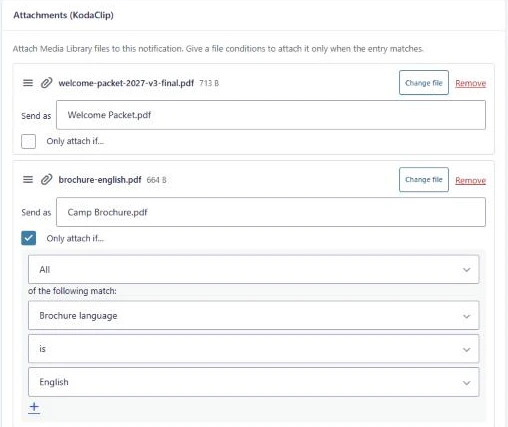
- In the file’s row, tick Only attach if….
- Leave All selected, then pick a field, a comparison and a value, for example Brochure language is Spanish.
- Click Update Notification.
That file now goes only with entries that match. Every other file in the list keeps its own setting.
Before you test with real submissions, click Preview, pick an existing entry and click Check. It shows which files that entry would get, using the settings on screen. See Preview.
What’s next
- Rename what recipients see with Send as.
- Set up a file per language, plan or option in one click with One file per choice.
- See Examples for complete setups.
Was this page helpful?
Thanks for letting us know.