
How to Customize Your Gravity PDF Layout Without Code
Updated November 10, 2026 · 4 min read
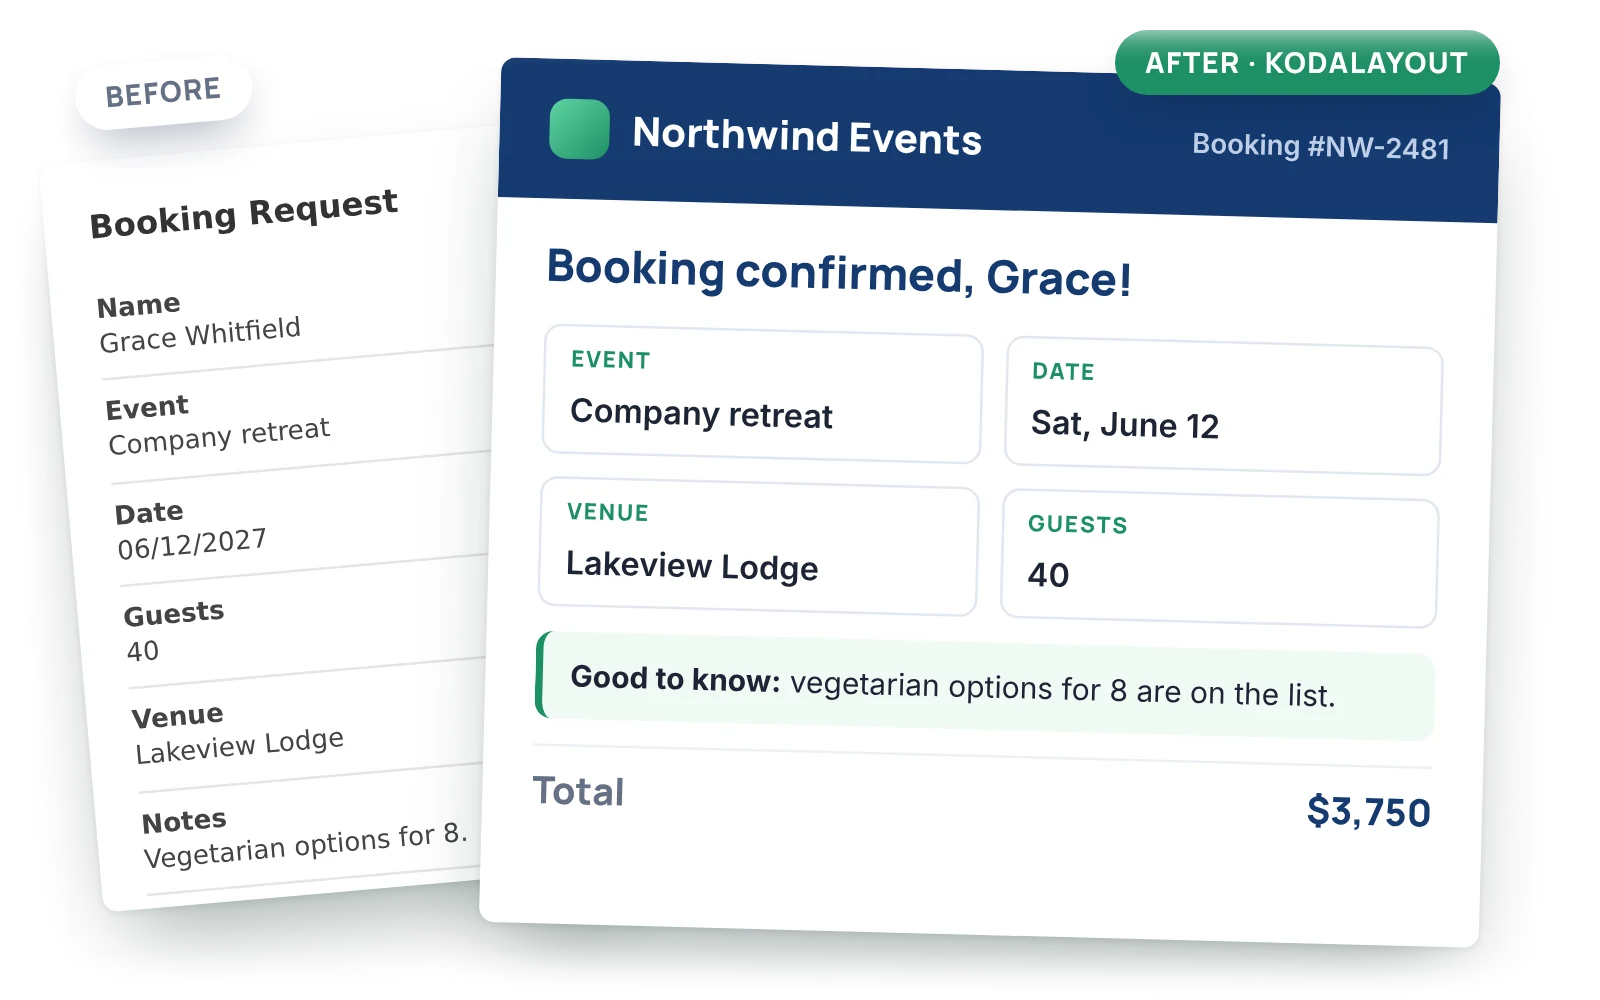
Gravity PDF turns entries into PDFs, and its templates look good. But by default a PDF is your form, field by field, top to bottom. For a service summary, a certificate, an invoice-style booking or a letter, that’s rarely what you want to hand someone.
This guide covers what you can change with Gravity PDF on its own, what a custom template involves, and how to design the layout with drag and drop instead.
What Gravity PDF can do on its own
Gravity PDF’s templates (Zadani, Rubix, Focus Gravity, Blank Slate and the premium ones) give you plenty of control over the look: paper size, orientation, fonts, colours, a header, a footer, a background and the form title. On the content side:
- The PDF follows your form’s order, with every field in it.
- Fields placed in columns in the form editor show in columns in the PDF, in templates that support it.
- You can choose whether empty fields show, and leave individual fields out of the PDF.
- The PDF itself can have conditional logic, so it’s only made for some entries.
What you can’t do from the settings is change the order, put fields side by side differently from the form, add headings or paragraphs that aren’t in the form, or leave out a section only for some entries.
The custom template route
For full control, Gravity PDF lets you write your own template: a PHP and HTML file in its PDF working directory, where you print each field yourself and lay it out with HTML tables or Gravity PDF’s column classes. It’s flexible and well documented, but it’s development work, and the template has to be updated whenever the form changes.
The no-code route: KodaLayout
KodaLayout adds a drag-and-drop layout builder to each PDF’s settings in Gravity PDF. You decide which fields appear and where, add your own headings and text, and Gravity PDF still handles the paper, fonts, header and footer.
1. Open the layout builder
Go to Forms, hover over your form and click Settings, then open the PDF tab. Click your PDF’s name, scroll to Custom Field Layout in the Advanced section, and tick Use a custom layout for this PDF.
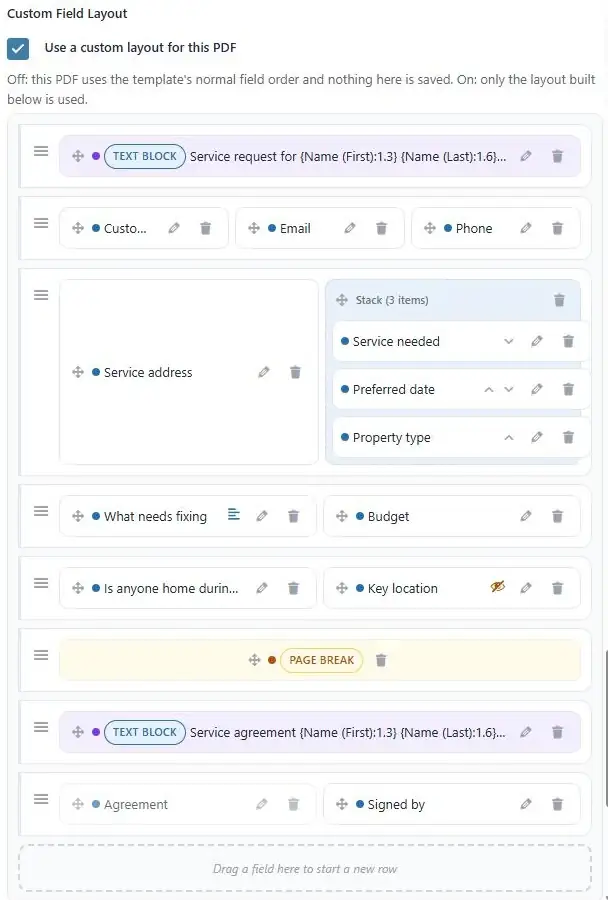
The builder opens with every field of the form, one per row, in form order. What you see in the builder is exactly what the PDF will contain.
2. Arrange the fields
- Remove a field you don’t want with its trash icon.
- Put fields side by side by dragging one beside another. Up to four items fit in a row.
- Stack several items in one column by dropping one onto another.
- Add a page break wherever a new page should start.
- Rename or hide a label in the PDF without touching the form.
3. Add your own text
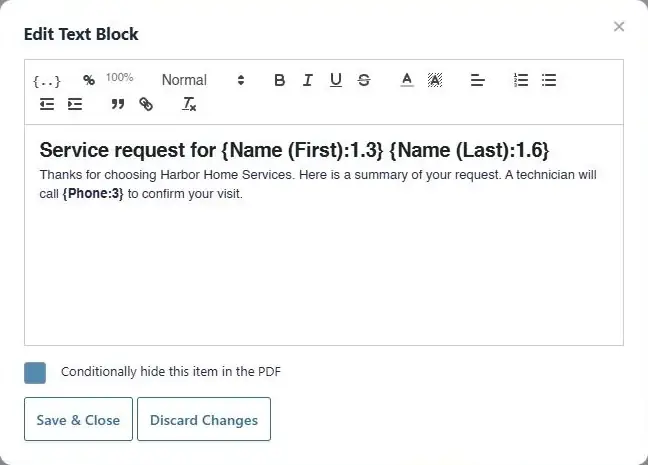
Click + Add Text Block for headings, paragraphs, lists and notes that aren’t in the form, such as terms, instructions or a thank-you. Text blocks can include field values, so a sentence like “Booked for Jane Smith on June 4” is built from the entry’s own answers. HTML blocks are there when you need more control.
4. Preview with a real entry, then save
Pick an entry under Choose an entry to preview with and click Preview. A real PDF of that entry opens in a new tab, using the layout as it is on screen. When it looks right, click Update PDF.
Nothing is saved until you click Update PDF at the bottom of the page.
Show a section only for some entries
Give any field, text block or HTML block a hide rule, for example hide “Key location” when “Is anyone home during the visit?” is Yes. Rules can compare text and numbers, so one layout can serve every entry without empty or irrelevant sections.
One layout per PDF
Each PDF on a form has its own layout. A form with a customer copy and an office copy can have two different layouts, or a layout on one and Gravity PDF’s normal order on the other. Layouts are saved with the PDF’s settings, so duplicating a PDF or exporting the form takes the layout along. If you ever switch KodaLayout off, PDFs go back to the template’s normal order and your layouts stay saved.
Which route should you take?
- The form’s order is fine, and you just want a nicer look: pick a Gravity PDF template and set its options.
- A layout that’s very different from anything a builder can do, and you write PHP: a custom template.
- Choose fields, arrange them, add text and hide sections without code: use KodaLayout.
See full before and after sample PDFs on the KodaLayout page, and every builder option in the KodaLayout docs.