
How to Show Gravity Forms Entries on a Calendar
Updated November 10, 2026 · 3 min read
Event submissions, room bookings, shift sign-ups, project deadlines: a lot of Gravity Forms entries are really about a date. In a list they’re hard to read. On a calendar, everyone sees at a glance what’s happening and when.
This guide covers what Gravity Forms offers for dates, the code route, and how to build a calendar of entries without code.
What Gravity Forms can do on its own
Gravity Forms has a Date field (with a date picker, drop downs or separate boxes) and a Time field, and you can sort and filter entries by date in wp-admin. That’s where it stops: there’s no calendar view of entries, in wp-admin or on your site.
The common workaround is sending each entry to Google Calendar or Outlook with an integration, then embedding that calendar. It works, but the calendar becomes a copy of your data. Edits in Gravity Forms don’t always flow back, and visitors can’t click an event to see or change the entry.
The code route
A developer can fetch entries with GFAPI::get_entries(), turn each one into an event, and feed them to a JavaScript calendar library. Then come the details: date formats, time zones, multi-day events, colours per form, who sees which events, and what happens when an event is clicked.
The no-code route: a KodaDash Calendar
KodaDash boards include a Calendar block. It places entries on the calendar by a Date field, and one calendar can show entries from several forms, each in its own colour.
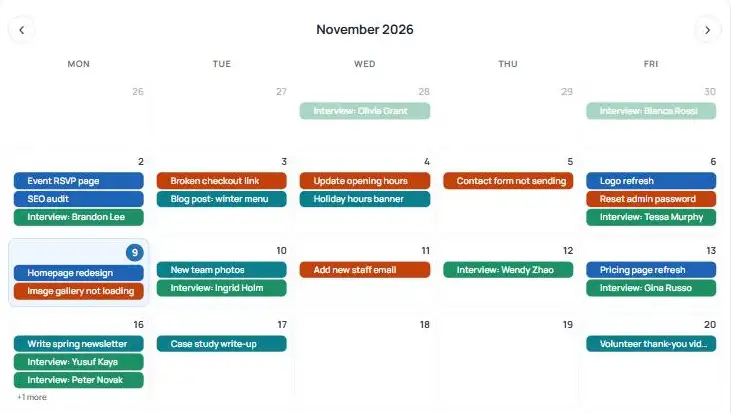
1. Add the Calendar and pick your forms
Add a Calendar block to a board. In its Source tab, pick a form and click Add, then choose its dates:
- Single date for one-day events, or a date range (start and end) for events over several days, shown as one bar.
- Optional start and end time fields, which place events on the hour grid.
- An event colour for each form.
Repeat for each form you want on the calendar.
2. Choose the views
Pick the view visitors see first: Month, Week, Day, Agenda (the next few days as a list) or a Single Event Card for “next event” on a dashboard. Tick two or more views to show buttons for switching between them; each visitor’s last choice is remembered.
3. Decide what events say and do
In the Events tab, use merge tags like {Name:1} to set each event’s text. Then choose what happens on click: nothing, open the entry’s edit form (for people allowed to edit), or open a Detail Board with everything about that entry.
Repeating events
A Drop Down or Radio Buttons field on the form can make entries repeat: every day, week, two weeks, month or year, with an optional “repeat until” date. Each entry is still one entry; the repeats are shown on the calendar, and dragging one moves the whole series.
Adding and moving events on the calendar
Two permissions turn the calendar into a scheduling tool:
- Clicking a date creates an entry. The form opens in a popup (or on its page) with the start date already filled in.
- Drag events to a new date, for the roles and people you choose.
New entries made from the calendar can trigger their own notification event, so you can email the right people when something is booked.
Subscribe and print
Tick Show a Subscribe button and logged-in visitors get a private calendar link for Google Calendar, Outlook or Apple Calendar. Each link only shows what that person can see on the board. A Print button prints just the calendar view.
Which route should you take?
- You only need a reminder in your own calendar: an integration that sends each entry to Google Calendar is enough.
- Visitors, staff or clients need to see, add and move entries on a calendar on your site: use a KodaDash Calendar.
You can click around a live calendar of four demo forms on the KodaDash page. Every option is in the Calendar docs.